Use Applications in the Management UI to onboard your Customers onto the Rail Platform and open their first Account. This is akin to a prospect filling out an application form so that they can become a customer.
In sandbox, you have to always create an Application to create a customer. However, once you create the application and customer, an account is automatically created as well.
Authentication occurs via email and password. If you wish to update your password, navigate to the login screen, click on Forgot Password, and follow the prompts to update your password appropriately.
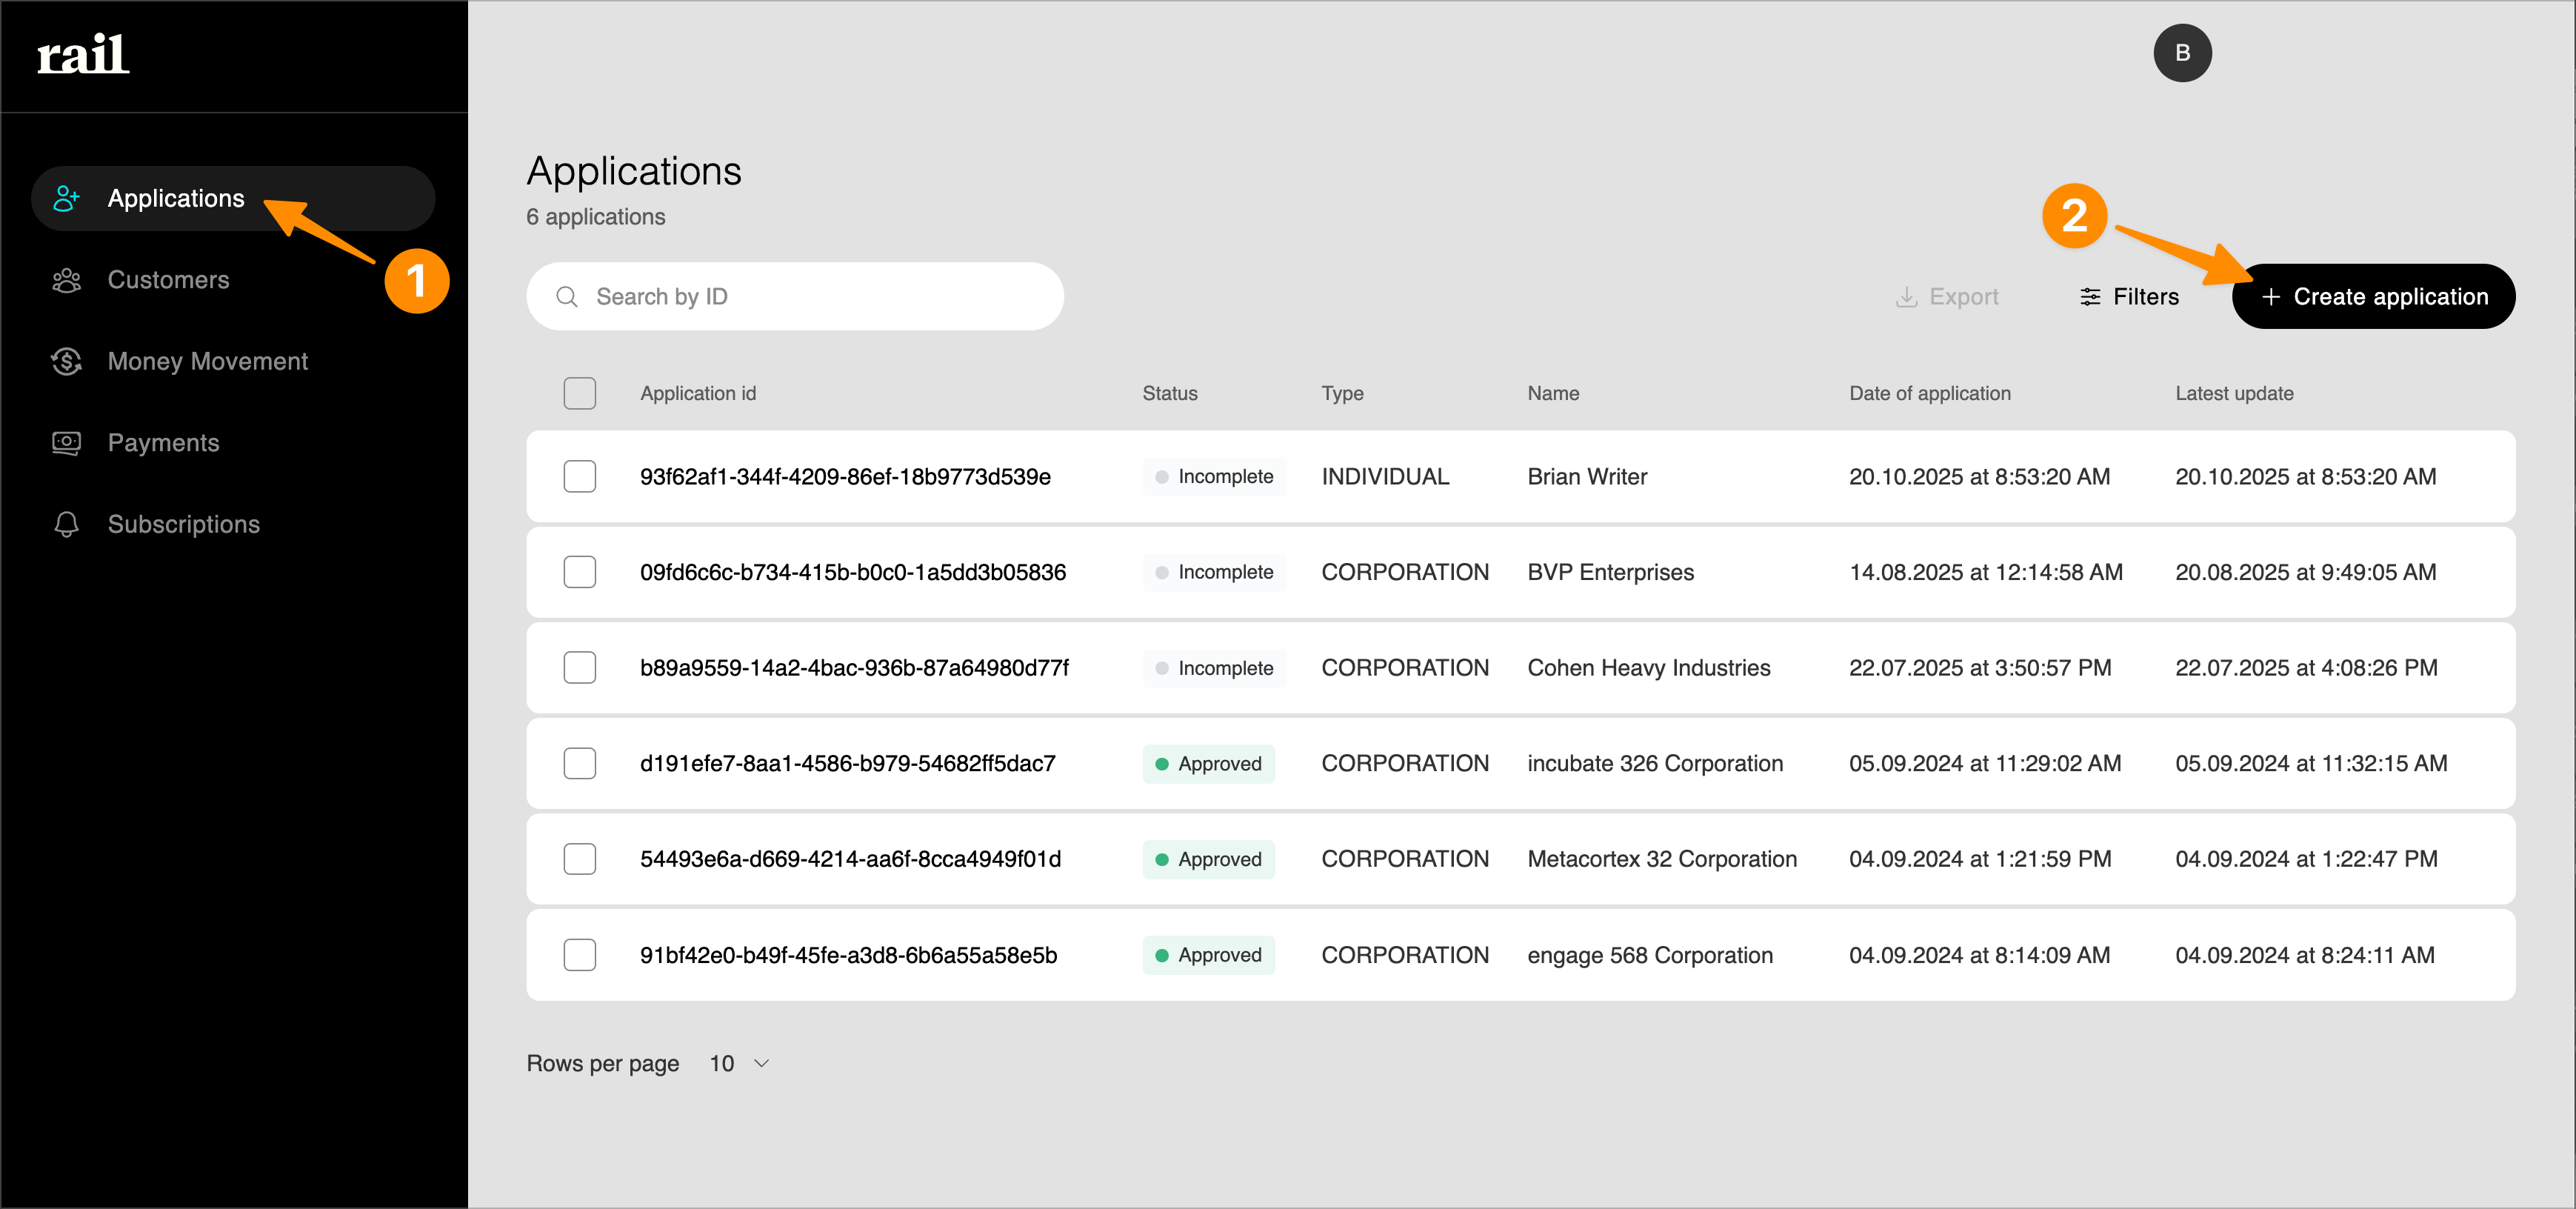
Begin by clicking on the “Applications” tab on the left column and then click “+ Create application"" on the top right. Disregard any existing applications at this time.
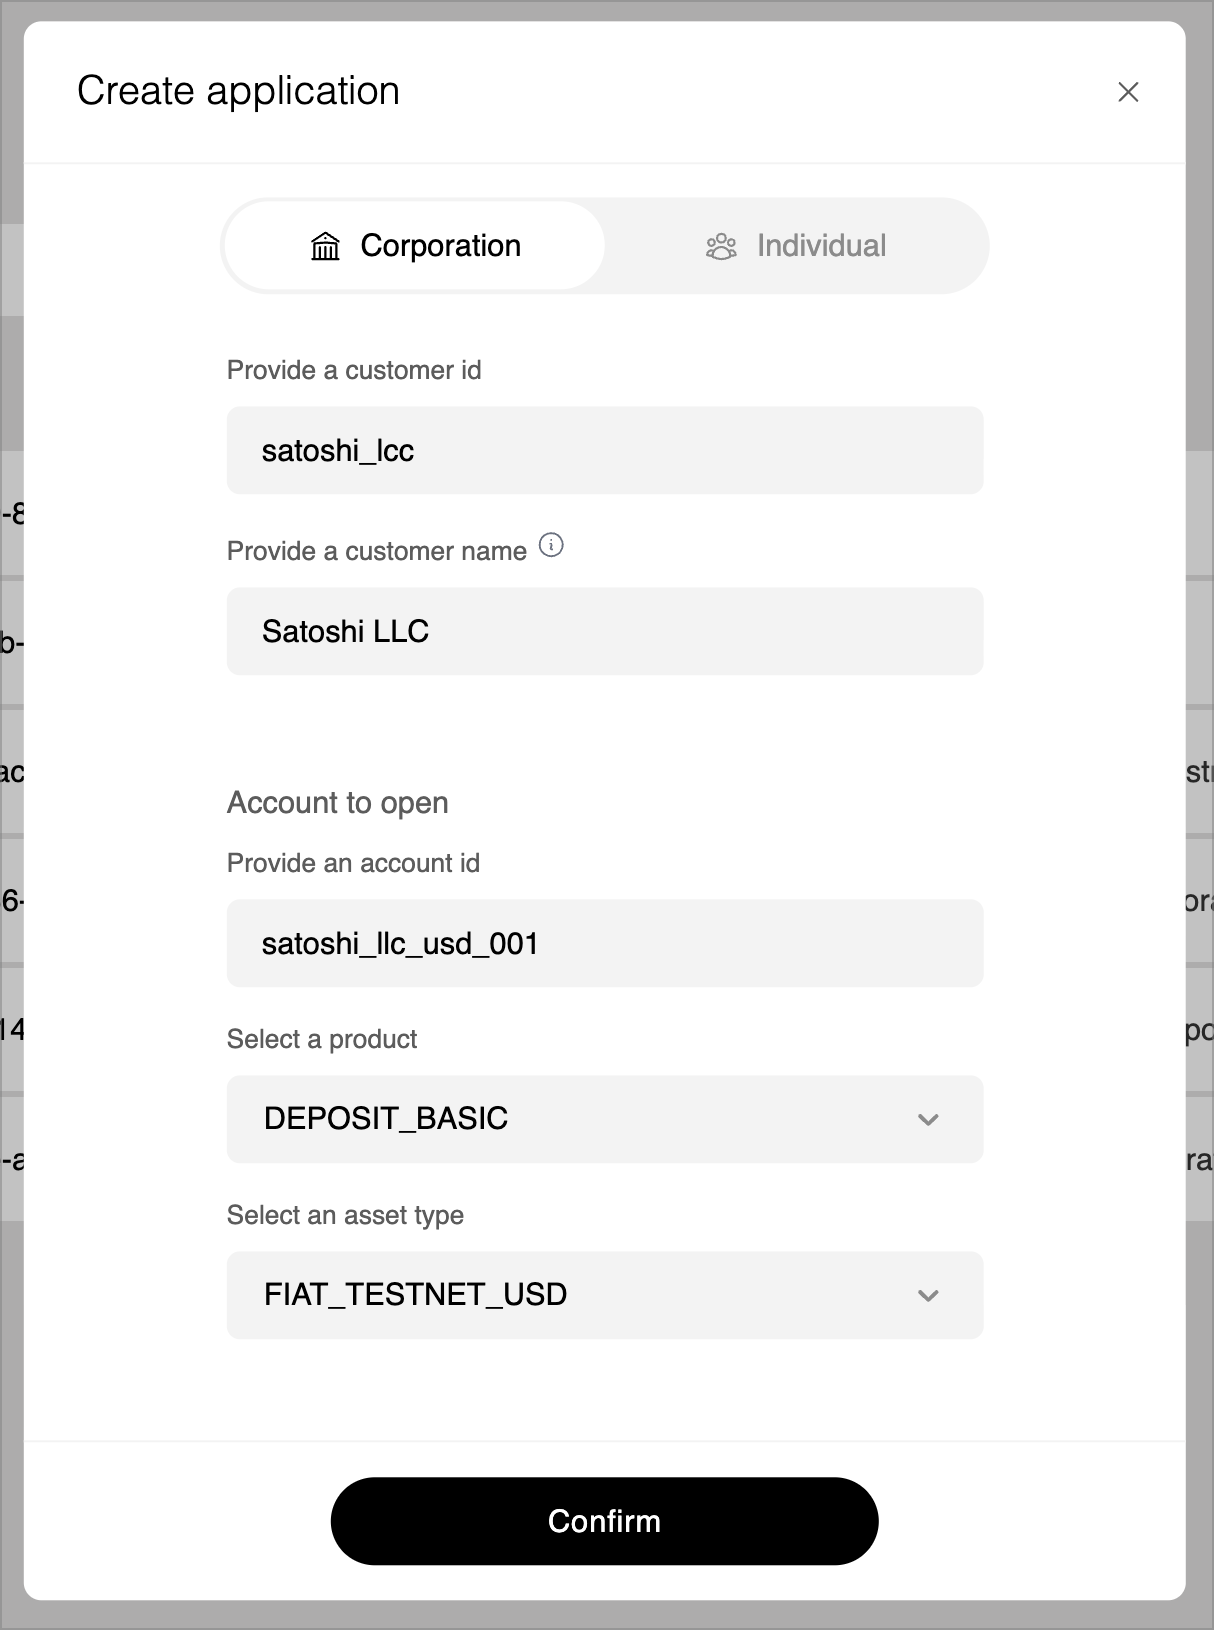
A popup box will appear to create the application and have fields to indicate the customer id, customer name, and details around the account to open for that customer as well as the asset type to create for their initial account.
Accounts are at the heart of the Rail platform. They are the core book of record for a customer’s financial transactions and are backed by a complex set of double-entry ledgers. An account has to belong to a customer and its behaviour is determined by a combination of the Product and Asset types.
We have 2 types of account products: Deposit and Payment. Each can hold either fiat or crypto assets.
A single account can only hold a single asset (e.g. ETH, USDC-ETH, BTC, USD). Today we support various fiat and crypto currencies. Learn more about the various product types, supported assets, and operations.
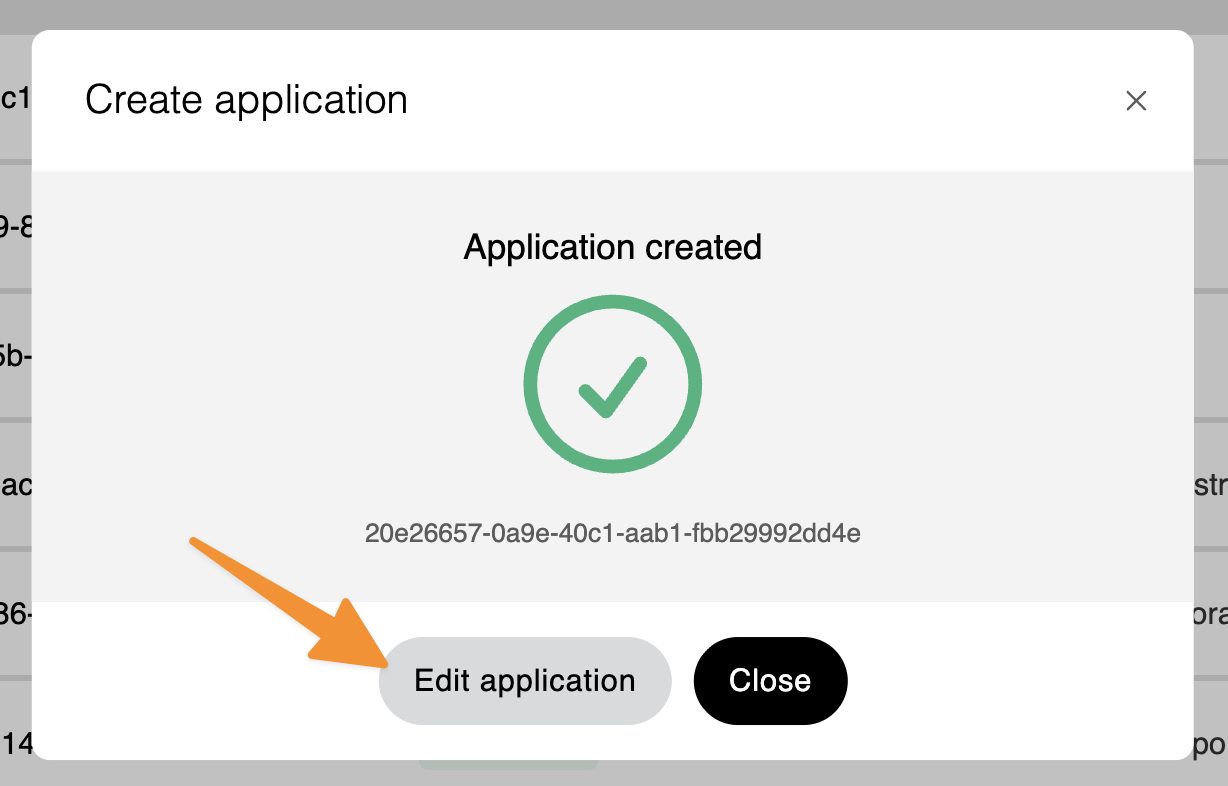
Once complete and confirmed, you are able to edit the application directly to add in personal data and information for the users, beneficial owners, etc. You click the Edit applications button that shows after you confirm the initial application details. Alternatively, you can always select the application from the Applications page, and click on the “Edit Application”. There you can fill out all of the information about the company, legal structure, etc. All required details in this form must be filled out to properly submit a customer application.
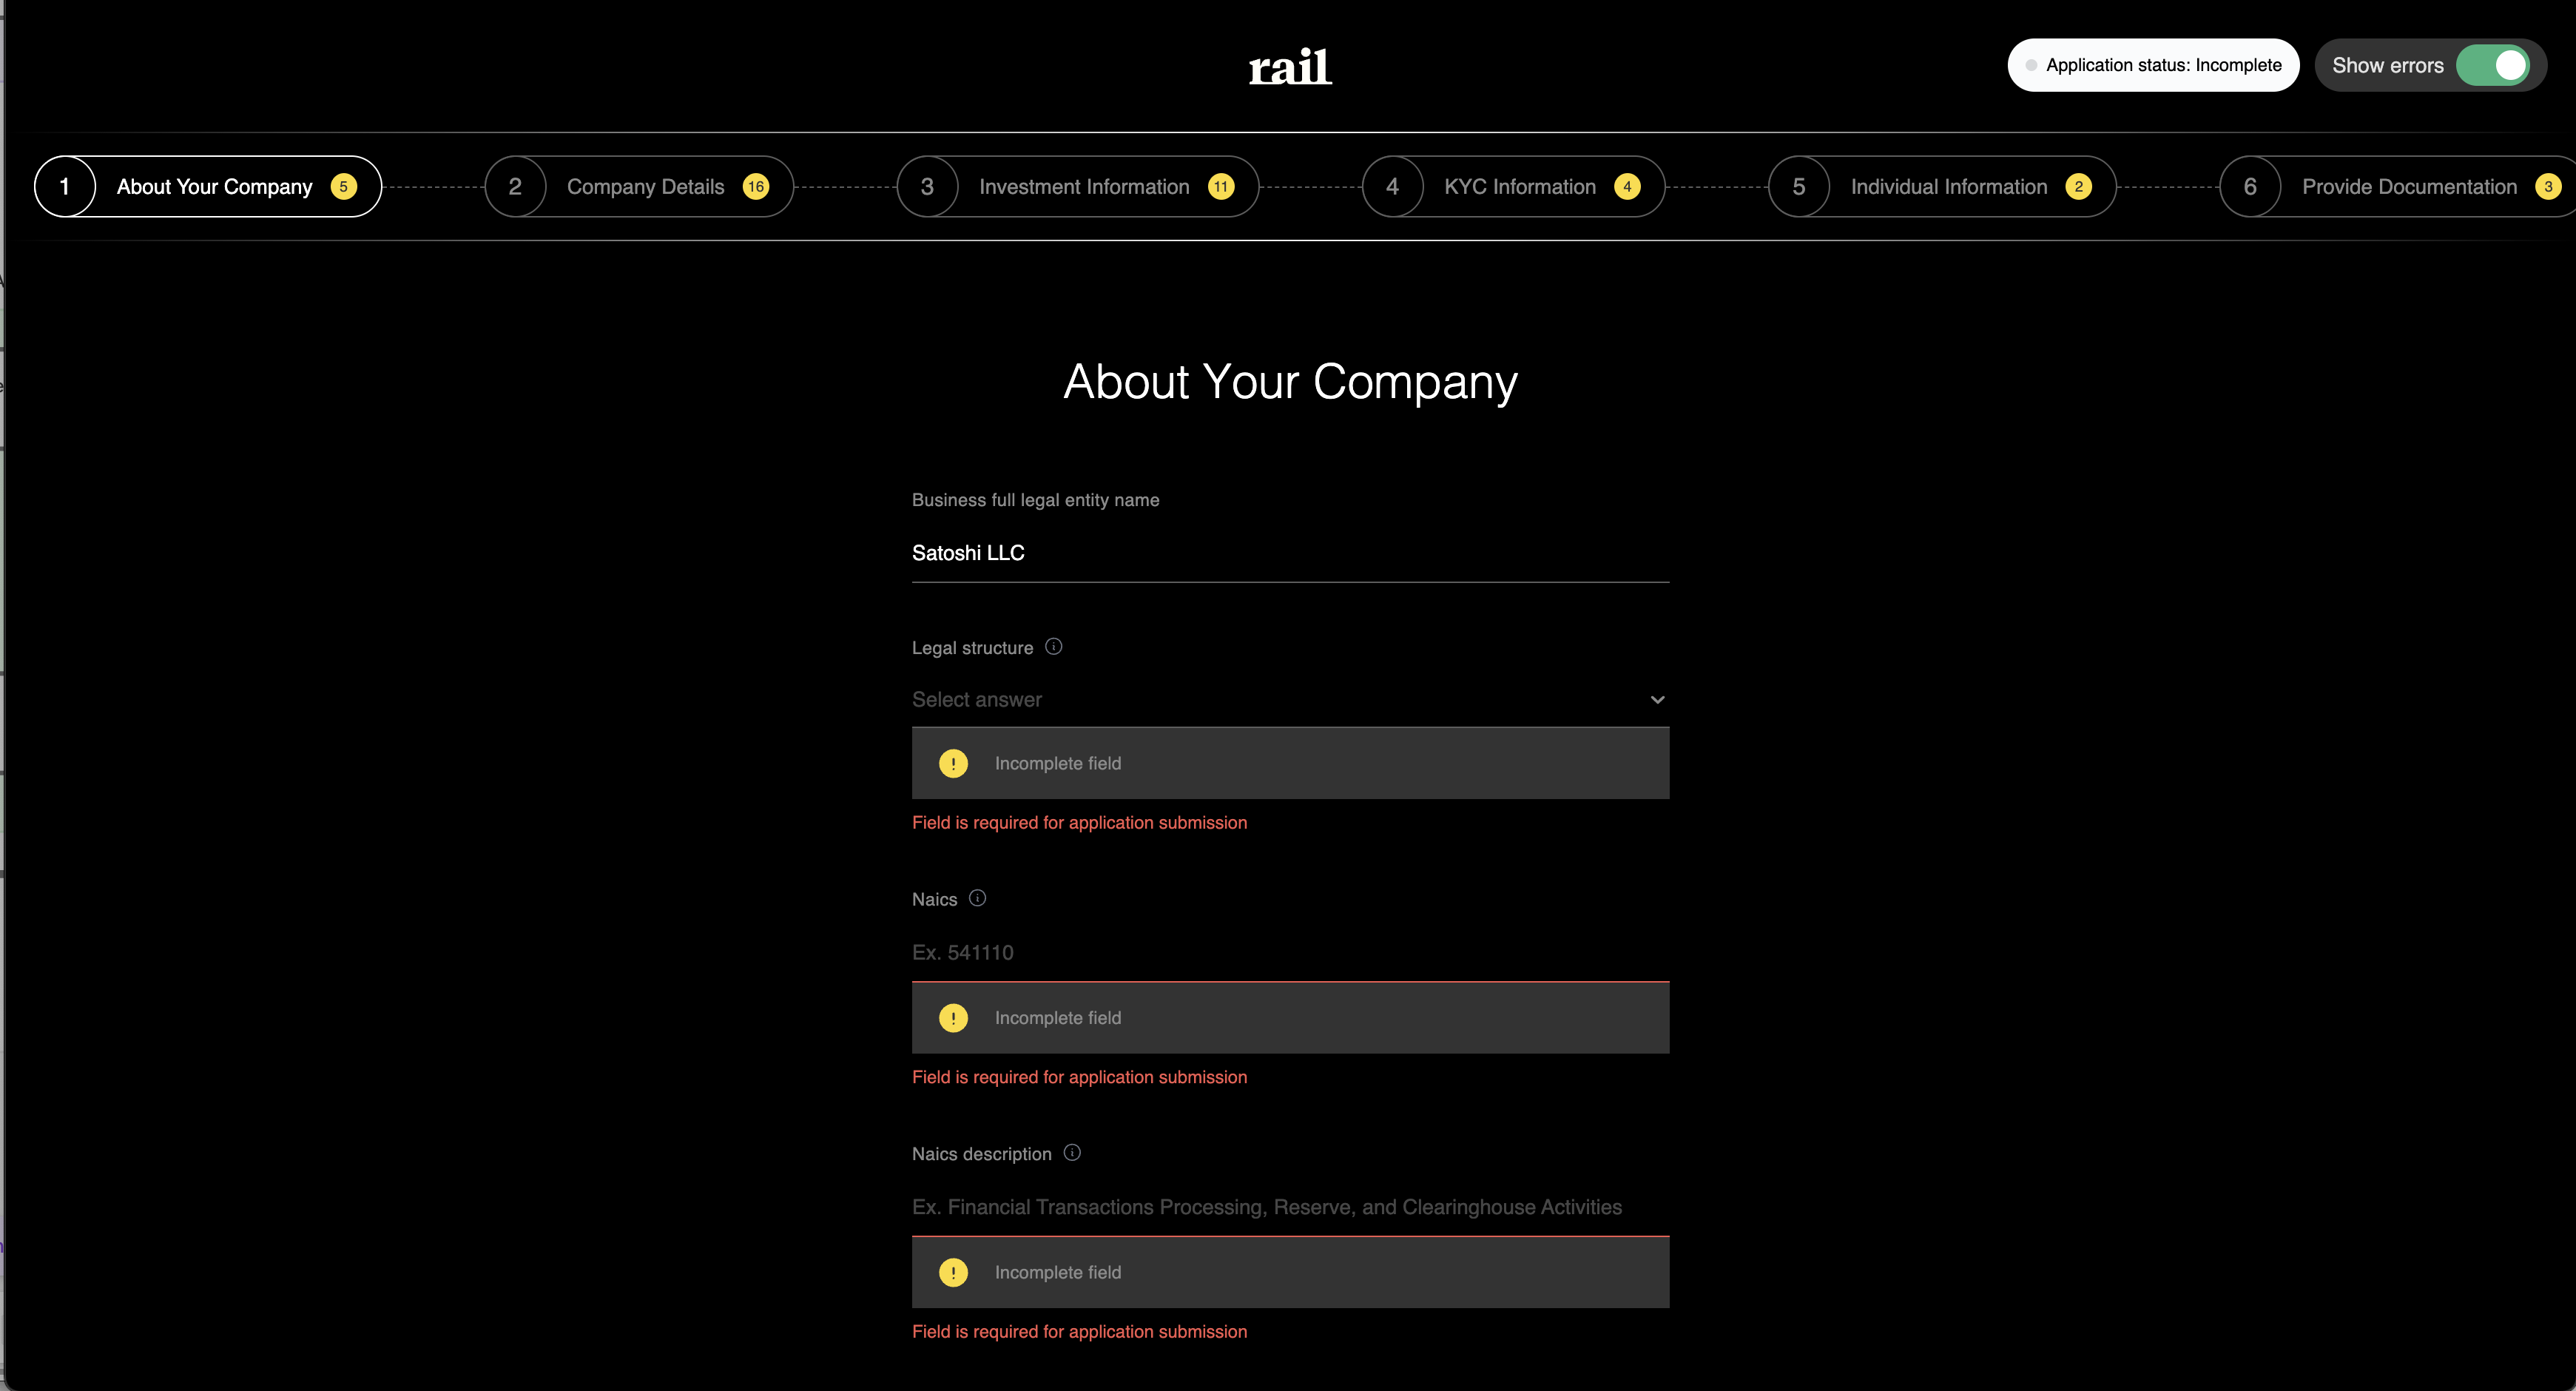
Below you can see the onboarding application and process. By filling out each portion of the application, you are dynamically asked updated questions and all fields have validations in place.
You can fill this out yourself, or you can pass the link on to the company themselves. The onboarding application via this link is publicly available and accessible to make it easy to pass to your clients.
Once completed, on the last page the user will Accept the Terms and Conditions.
Rail requires that users sign an account agreement and agree to Rail's privacy policy. This can be accomplished a few ways:
- The client can hand sign or docusign the agreement and upload to the form.
- they can agree to the terms and conditions via an e-signature/agreement (for example, you may provide a link to Rail's Customer Agreement and Privacy Policy in your own Terms & Conditions that your customers agree to). If that is the case, Rail will need to verify the agreement and that the flow is in place for your users to make this agreement.
Once submitted, the application will begin processing. If there is additional information needed by Rail or our partners, we will proactively reach out to you for the clarification or additional information or documentation as required. In general, these approvals are automatic and are processed within the hour, but sometimes may take 1-3 business days.